Bra-A-Week Challenge: Weeks 5 and 6

SAM_2737Hello once again. I’m so glad to be able to finally write about my recent makes. I have three different bras to present. One is a Watson Bra (sorry if sewing this bra is becoming boring but I truly enjoy making this one and love the bra!), another is Kwik Sew pattern 3300, and finally the Florence Bra from Seamwork Magazine.SAM_2707I will SAM_2721SAM_2735start off with the Watson bra since it’s one you are already familiar with. I really don’t have much new to add about this bra as far as the construction process except the only thing I added to it is another layer of fabric on one side of the cups (the armhole side) because I really wanted the cups to hide some exposure and lucky for me, it worked. I also took in about 1/4 inch dart from the armhole cup because I was getting a bit of a gap. It is much better but I still notice a small gap. For my next Watson I will take in maybe another 1/4 inch dart from the side of the cradle and hopefully that will do it. Overall, I’m very please with how this bra came out. I really love the bright pink with white. The fabric is from Spandex House (will not purchase from them again due to bad customer service) and notions from Etsy shops MarySupplies, Porcelynne Fabric Boutique, and Arte Crafts. 

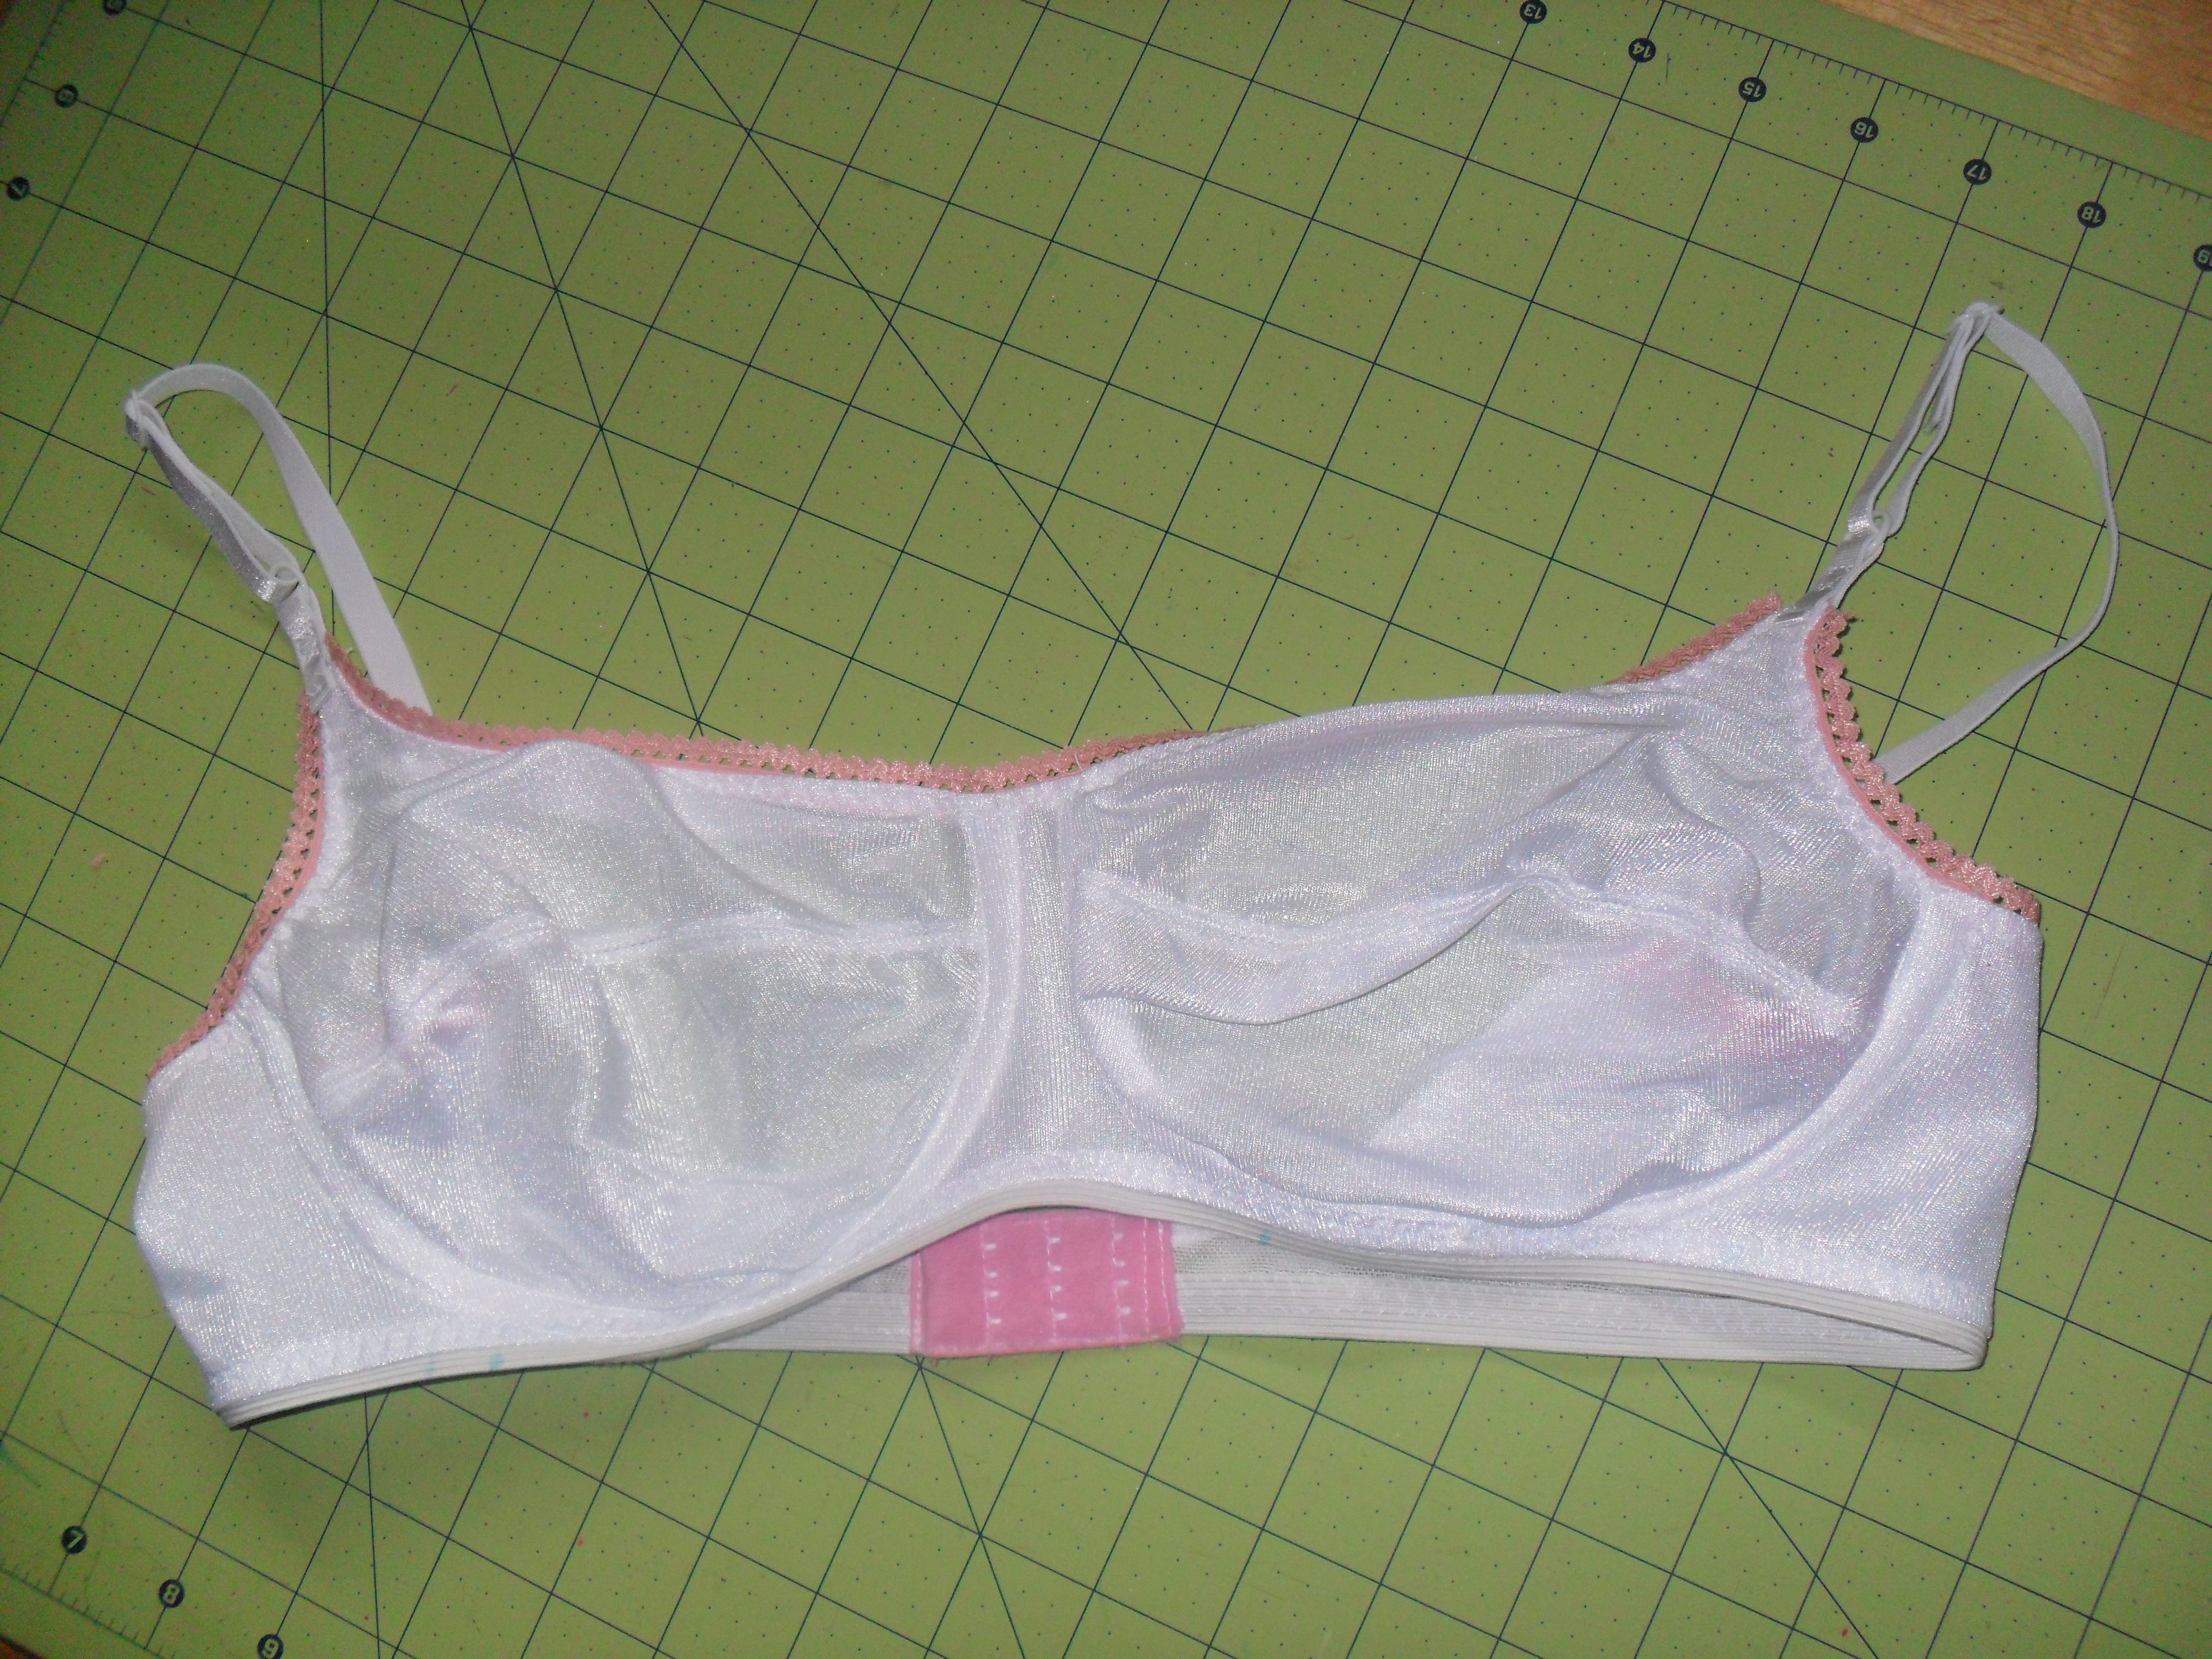
Now for another favorite but this one acts and feels like a real RTW bra, KWIK SEW pattern 3300. It is an underwire bra which offers support and surprising it’s also comfortable. This is the first underwire bra I have ever owned that actually felt comfortable. The wire did not poke or sit wrong. This bra did take a bit longer to make because it is has a few different steps but surprisingly not difficult at all. I used white Denair 40 Tricot which I have in my stash for main fabric on the side cup and also for the straps. I used Aqua color stretch lace for the neckline side cups, which by the way is amazing. I purchased the lace from MaryNotMartha Etsy shop. The channeling from Procelynne Fabric Boutique and the underwires from CalaOssidiana Etsy Shop. The pattern instructions are a bit confusing but I followed most of the instructions. I have to admit though, that the Bra Making class on Craftsy by Beverly Johnson definitely helped. Overall, I really love the bra, it’s simple and pretty. I will be making this one again for sure. I made some mini bows for these first two bras on this post using a youtube tutorial from Handimania, Tiny Bow On The Fork if you are interested in making your own and do not know where to start like I did. They are fun, easy to make and make your finished bras look even cuter.

SAM_2709 SAM_2715 SAM_2732

Now for my disaster make, the Florence Bra. I really thought this bra would be really cute but after making it (and it could be completely my fault) I felt very discouraged. This bra definitely sewed quick, it is very easy and even similar to the Watson construction process but once I put it on, it did not fit at all which is the main reason it not looking right. I wanted to add the channeling and casing but I was skeptical. The bra was very stretchy so it did not sit correctly. I should also add that it might be completely my fault because I did not stabilize the cradle but the pattern instructions did not really specify or I missed it. I will be taking it apart and try again. One thing I did change is adding a back closure because this bra is meant to just slip over your head and I don’t really want to struggle trying to get it on. I used stretch charmeuse instead of stretch lace for the neckline side cup and powernet for the rest. I do like the color combinations but it has no support whatsoever. I will try to make this bra again and hopefully I won’t forget to add in the cradle support. I will write another post when I get a good fit on this Florence Bra and let’s hope the next one will be much better.

SAM_2726 SAM_2729 SAM_2730

Overall, this bramaking experience has been really amazing. I just received a new pattern from Merckwaerdigh, BHS10 and I can’t wait to give it a try so expect another post on this some time soon. As far as my BurdaStyle sewing, I’ve really been lagging for no good reason. I am super inspired by the patterns but I guess I don’t look forward to another disappointed finish. But for sure, I will sew something BurdaStyle soon. I need some professional looking pants and skirts since I just started a new part-time job as a Bookkeeper (wish me luck!) and nothing that I had before fits and I refuse to buy any new clothes (I’ve been trying to lose some weight, I need to drop at least five lbs within the next week). So I have to get it together and get started. I plan on making at least two skirts and three to four pants. Let’s hope I can get this done within two weeks starting today. I just gotta! Well, that’s it’s it for now and any encouragement from you part would be greatly appreciated!

Bra Challenge: Week 3 and Week 4?

As much as I’ve been trying to, there just isn’t enough time in a day to get everything done. It’s been a bit difficult to make time for everything and everyone but mostly, writing. I finally decided to sit down and write and make everything and everyone wait until this is done. The one thing I’ve reserved time for is bra making. I really want to gain bra making skills so I’ve been pushing myself to make the time. Overall, I feel more confident in my ability of tackling the construction process every time I finish sewing a bra. I’m currently working on the Florence bra from Seamwork Magazine and as soon as it’s done I’ll share it. In the meantime, I would like to share two of my completed Watson Bras. I truly love this bra for it’s longline style and it’s comfort. It also provides some support but I wish it offered more. No matter though because I plan on making a collection of many colors.

SAM_2666For this Watson bra, I used shiny milliskin in cantaloupe from Spandex House. I really like the fabric as it’s a soft feel and it stretches firmly and softly at the same time, it’s hard to explain but really awesome. I used glittered bra straps from Etsy shop Porcelynne Fabric Boutique. The straps look cute but they are a bit itchy. The  rings, sliders, black glittered picot elastic I used on the band, cradle, neckline and side arm was also purchased from the Etsy shop Porcelynne Fabric Boutique and are all 3/8″ in width.

To line the cradle, I used 40 Denair Tricot (which I have a lot of) which I purchased from Fabric.com. I do think it works well to stabilize the cradle even though it is a bit hard to work with because it is so slippery. The Watson instructions suggests to baste it in place but I don’t because it hard to work with and it also saves me some time. For the bands, I lined used powernet as lining and milliskin. Overall, I really liked the finished bra but next time, I will try and match all around the elastics and probably try to use two layers of milliskin on the cradle and one side of the cups.

SAM_2697 SAM_2699

One other thing I would like to mention is that I will never again order from Spandex House because I feel like they ripped me off. They charged me $17 just on shipping without letting me know what the total cost of my purchase would be. I ordered two other one yard fabrics so my total purchase would be $30 so I thought I’d spend no more the $10 on shipping but I thought I would receive an email with an invoice but nothing. Not even a phone call. I called them myself to find out how much shipping would be and when they told me, I wanted to cancel but they told me it was too late because they had already shipped it out. I was furious but polite. I emailed them expressing how upset I was and no one even cared to acknowledge my email as I didn’t receive a reply. I would recommend trying Spandex World as I didn’t have this issue at all with them and they carry milliskin or even FabricDepotCo.com. It’s the same type of fabric and for about $1 more. It will save you in shipping costs so it’s worth to try them instead.

SAM_2672Now back to bras. For this next one, I used stretch lace for the cups, cradle and band which I already had in my stash. I purchased this lace from Fabric.com and used yellow picot elastic for the neckline, side arms and cradle. I lined the cups and cradle with 40 Denair tricot and lined the bands with powernet. All the notions, again, I purchased from Etsy shop, Porcelynne Fabric Boutique. This bra is very lightweight but very comfortable. The only thing is I wish I had at the time, yellow bra straps but I didn’t so I used black instead. It’s not very matching but I really love the comfort of this one, no itching at all.SAM_2673 SAM_2680 SAM_2684 SAM_2690

These are my Week 3 and Week 4 shares of the Bra challenge and I’m more motivated than ever. As I mentioned before, I’m currently working on the Florence bra from Colette and I already love this bra even though I haven’t worn it yet. It’s a simple bra and I find it to be similar to the Watson except it doesn’t need hook and eyes. Also, you have the option of adding channeling and underwire for added support.  If you have time to, I recommend reading this months Seamwork magazine as it’s focus is lingerie. They mention a lot of helpful tips and even list some great supply resources to look into.

An update on the BurdaStyle challenge I’m participating in, I did sew a dress but it did not come out as I hoped because of my fabric choice. I have to take in a minimum of 2″ all around so I plan on finishing this simple dress sometime this coming week. I did do a January BurdaStyle pattern but I have go back and change the whole thing to fit, ugh! Oh well. As soon as I can, I will post on the blog the finished outfit. Thanks for reading and I hope you have an amazing Valentine’s Day!

My First Watson Bra: Pattern Review

clothhabit watsonIt’s been two weeks since my last post and it’s crazy how time just fly’s by where I actually didn’t notice. I’ve actually been working on a few sewing projects and I wish they were done by now but I can’t stress about it too much. I will do my best to get this projects done as soon as possible and share the awesome sewing experience. For now I have to share this awesome bra pattern. I finally finished my first Watson Bra and here I am sharing my experience for this awesome pattern. I’ve been following many sewing bloggers who have also sewed this bra pattern and I agree with them when they said this is a great beginner bra pattern to try or even if you are not a beginner in bra making, this bra is a must have. What I love the most is the longline style which is mainly why I purchased this pattern. I’ve been wanting a longline for a while and I’m really glad I sewed my own.

SAM_2632

The instructions on the pattern are very detailed with helpful images. I followed the instructions but I also went ahead of myself and did not notice the stitch recommendation for the waistband. My next one will probably have better stitching in the waistband. I ended up using a regular zigzag stitch instead of a three-step zigzag and I wish I would have noticed. Oh well, this is my first one and I’m still pleased with the results. Surprisingly, that is the only mistake I made so I kinda feel proud of myself for not making more (Lol!). Anyway, I can’t really say I had any difficulty putting the pieces together except for the hook and eye. I changed my presser foot from regular to a zipper foot hoping it would be easier to sew close to the edge but instead the zipper foot pushed the hook and eye a bit too far off so I had to use my seam ripper. Now that was hard but I kept patient and got it done.

Pattern Description: Cloth Habit Watson Lingerie Set, comes in sizes 30B-30I to 40A-40D

Fabric: I used a lace powernet from Spandex World (which unfortunately seems like they do not carry it anymore) for the cups, cradle and back band and lined the cradle with Tricot from Fabric.com.

Notions: The elastics, hook and eye, and the rings and sliders I purchased from Porcelynne’s Fabric Boutique etsy shop.

Repeat: I definitely will be making this bra again. I hope to make the matching bikini in the very near future (maybe when I need a break from bramaking, if that could actually happen, lol!)

SAM_2645

SAM_2638

SAM_2639

SAM_2643

SAM_2647

SAM_2658

I hope to encourage bramaking to anyone willing to sew and if you do, I recommend starting with this pattern. I need to make-up for the bra-making challenge because I did miss a week so I should be making two more in the next couple of days. What do you think? Willing to try?


Pattern Review: DIY Silk Tank from BurdaStyle

Oh my gosh I love this pattern! I’m so excited about completing this tank. I’ve been wanting to make this for some time now and I finally made the time to make it happen. I used fabric I had in my stash and it has such an awesome soft feel and great drape. The pattern is made with only two pattern pieces but you end up cutting four pieces for each. I totally recommend this pattern for any newbie learning to sew.

SAM_2579The fabric is a bit slippery but I really only had trouble cutting it (I probably need better scissors) and not really sewing. I used a stretch needle on the sewing machine hoping it would not cause any visible hole punctures and it worked great. The pattern requires stay tape for the neckline and I didn’t have any on hand so I used some Tricot fusible interfacing. Not sure if it won’t workout but for now, I’m just so happy the tank came out awesome. Now I need to make a skirt that will go with it. I will be looking through my pattern collection and see what I find.

Pattern Description: Silk Tank 07/2013 #103B from BurdaStyle

Pattern Size: I used size 42 and made not alterations to the pattern.

Fabric: Mauve Stretch Charmeuse, about 1.75 yards, I purchased it from OnlineFabricStore.net. They have a good amount of color selection.

Repeat: I will be making this again. I really want one in a shimmering gold color and another in a print lighter weight fabric.

SAM_2578

SAM_2573Is there a pattern you would love to make is all kinds of colors? I think this is a good pick for me. Thanks for reading!

Bra-A-Week: My First Bra!

Yay! I’m so happy I finally gave bra-making a try. I was hoping to have the bra finished by Sunday but took me a bit longer. I took my time sewing this bra because I really wanted to understand each construction process and overall I feel more confident in making another bra. This is just a test fit bra so you will notice I didn’t use all that great fabric, elastic and straps but I’m still proud of the outcome.

SAM_2561The pattern I used came along with the book Bare Essentials Bras Construction and Pattern Drafting for Lingerie Design by Jennifer Lynne Mathews-Fairbanks which is a basic bra pattern. The instructions in the book were good but the only thing they really failed to explain was what direction the pattern pieces need to be cut from the fabric. As I sewed the bra, I followed along with Beverly Johnson in my Craftsy class, Sewing Bras: Construction and Fit. I really enjoyed sewing along with Beverly, she made every step seem so easy and it was. I think the hardest part for me in sewing the bra was the top-stitching of the channeling but I’m not too worried about it because I know as I continue to practice these skills, it will only get better.

SAM_2566

SAM_2567

The pattern that came with the book is a very basic bra but has similar components as the Pin-up girls classic bra Beverly was using in the class. Beverly does mention most bras have the same components and so I’m glad this pattern worked out. One thing I did not like is that the band of this bra is really narrow, at least it seamed that way. After sewing in the channeling, I noticed the channeling would stick out a bit. The bra surprisingly fits very well in comparison with what I have been using in RTW. I did not add the underwire to the bra because I did not want to waist the wire on my test pattern but I think it would not make a difference because of the type of fabric I used on the cups. I used 40 Denair Tricot in white for the cups, the center front band and the side front band. I also interfaced the side front band and the center front band with fusible tricot to give some stability. When I was ready to sew the cups onto the band, the cups were too flimsy so I cut out strips of fusible tricot interfacing and sew strips onto the armhole  and the neckline of the cups. It really made a difference in sewing them to the band and when adding the elastic. I made a few mistakes as I tend to do since I still consider myself beginner sewer but as always they turn into a learning experience and wouldn’t have it any other way. This bra is my first bra of the Bra-A-Week challenge and so happy I got to start.

SAM_2569

SAM_2568

I’m participating in the Watson Bra Sew-Along  which is starting this Thursday and I’m out of some materials. I guess I will have to start a bit late. Anyone who is nervous to start sewing their own bras should know this is so much easier than trying to fit a basic top pattern. 100 times better! I will be talking about my fitting troubles in another post. No matter what, I will continue to conquer these skills in bra-making and I hope to be of inspiration and motivation to others.